Joystick Input Sentuh Seluler di Unity
Untuk membuat karakter yang dapat dikontrol dalam game seluler, seseorang harus menambahkan tombol yang direpresentasikan secara visual di layar dan responsif terhadap input sentuh.
Dalam tutorial ini, saya akan menunjukkan cara membuat tombol seperti joystick di Unity, yang terutama cocok untuk kontrol gerakan pada ponsel layar sentuh.

Anda juga dapat menggunakan contoh di bawah ini untuk menambahkan lebih banyak tombol dan joystick. Jadi mari kita mulai!
Langkah 1: Buat Semua Skrip yang diperlukan
- Buat dua skrip C# menggunakan kode sumber di bawah ini
SelulerJoystick_UI.cs
using UnityEngine;
using UnityEngine.UI;

public class MobileJoystick_UI : MonoBehaviour
{

    //Mobile controller graphics
    public Sprite navigationCircle;
    public Sprite navigationButton;
    //Use this in your movement script for the input control
    public Vector2 moveDirection;
    //Joystick components size
    int circleSize = 120;
    int buttonSize = 100;
    //How far the joystick should be placed from the side of the screen
    int marginLeft = 100;
    //How far the joystick should be placed from the bottom of the screen
    int marginBottom = 100;

    Canvas mainCanvas;

    //Mobile movement
    [System.Serializable]
    public class JoystickButton
    {
        public Image backgroundCircle;
        public Image mainButton;
        public Rect defaultArea;
        public Vector2 touchOffset;
        public Vector2 currentTouchPos;
        public int touchID;
        public bool isActive = false;
    }

    //Move joystick data
    JoystickButton moveTouch = new JoystickButton();

    public static MobileJoystick_UI instance;

    // Start is called before the first frame update
    void Start()
    {
        if (instance != null)
        {
            //There is another instance already present, remove this one
            Destroy(gameObject);
            return;
        }
        //Assign this instance to a static variable so you can access the movement direction directly at MobileJoystick_UI.instance.moveDirection
        instance = this;

        //This function will initialize canvas element along with the joystick button
        GameObject tmpObj = new GameObject("Canvas");
        tmpObj.transform.position = Vector3.zero;
        mainCanvas = tmpObj.AddComponent<Canvas>();
        mainCanvas.renderMode = RenderMode.ScreenSpaceOverlay;
        mainCanvas.pixelPerfect = true;

        //Add Canvas Scaler component
        CanvasScaler canvasScaled = tmpObj.AddComponent<CanvasScaler>();
        canvasScaled.scaleFactor = 1;
        canvasScaled.referencePixelsPerUnit = 100;

        //Add Graphic Raycaster element
        tmpObj.AddComponent<GraphicRaycaster>();

        //Setup navigation background
        GameObject cntrlTmpObj = new GameObject("Movement Circle");
        cntrlTmpObj.transform.position = Vector3.zero;
        cntrlTmpObj.transform.parent = tmpObj.transform;
        moveTouch.backgroundCircle = cntrlTmpObj.AddComponent<Image>();
        moveTouch.backgroundCircle.sprite = navigationCircle;
        moveTouch.backgroundCircle.rectTransform.anchorMin = new Vector2(0, 0);
        moveTouch.backgroundCircle.rectTransform.anchorMax = new Vector2(0, 0);
        moveTouch.backgroundCircle.rectTransform.sizeDelta = new Vector2(circleSize, circleSize);
        moveTouch.backgroundCircle.rectTransform.pivot = new Vector2(0, 0);
        moveTouch.backgroundCircle.rectTransform.position = new Vector3(marginLeft, marginBottom, 0);

        //Navigation button
        cntrlTmpObj = new GameObject("Movement Button");
        cntrlTmpObj.transform.position = Vector3.zero;
        cntrlTmpObj.transform.parent = tmpObj.transform;
        moveTouch.mainButton = cntrlTmpObj.AddComponent<Image>();
        moveTouch.mainButton.sprite = navigationButton;
        moveTouch.mainButton.rectTransform.anchorMin = new Vector2(0, 0);
        moveTouch.mainButton.rectTransform.anchorMax = new Vector2(0, 0);
        moveTouch.mainButton.rectTransform.sizeDelta = new Vector2(buttonSize, buttonSize);
        moveTouch.mainButton.rectTransform.pivot = new Vector2(0, 0);
        moveTouch.mainButton.rectTransform.position = new Vector3(marginLeft + (circleSize - buttonSize) / 2, marginBottom + (circleSize - buttonSize) / 2, 0);

        //Save the default location of the joystick button to be used later for input detection
        moveTouch.defaultArea = new Rect(moveTouch.mainButton.rectTransform.position.x,
            moveTouch.mainButton.rectTransform.position.y,
            moveTouch.mainButton.rectTransform.sizeDelta.x,
            moveTouch.mainButton.rectTransform.sizeDelta.y);
    }

    // Update is called once per frame
    void Update()
    {
        //Handle joystick movement
#if (UNITY_ANDROID || UNITY_IOS || UNITY_WP8 || UNITY_WP8_1) && !UNITY_EDITOR
        //Mobile touch input
        for (var i = 0; i < Input.touchCount; ++i)
        {
            Touch touch = Input.GetTouch(i);

            if (touch.phase == TouchPhase.Began)
            {
                MobileButtonsCheck(new Vector2(touch.position.x, Screen.height - touch.position.y), touch.fingerId);
            }

            if (touch.phase == TouchPhase.Moved )
            {
                if(moveTouch.isActive && moveTouch.touchID == touch.fingerId)
                {
                    moveTouch.currentTouchPos = touch.position;
                }
            }

            if (touch.phase == TouchPhase.Ended || touch.phase == TouchPhase.Canceled)
            {
                MobileButtonStop(touch.fingerId);
            }
        }
#else
        //Desktop mouse input for editor testing
        if (Input.GetMouseButtonDown(0))
        {
            MobileButtonsCheck(new Vector2(Input.mousePosition.x, Screen.height - Input.mousePosition.y), -1);
        }

        if (Input.GetMouseButtonUp(0))
        {
            MobileButtonStop(-1);
        }

        moveTouch.currentTouchPos = Input.mousePosition;
#endif

        //Moving
        if (moveTouch.isActive)
        {
            moveTouch.mainButton.rectTransform.position = new Vector3(moveTouch.currentTouchPos.x - moveTouch.touchOffset.x, moveTouch.currentTouchPos.y - moveTouch.touchOffset.y);
            moveDirection.x = moveTouch.mainButton.rectTransform.position.x - moveTouch.defaultArea.x;
            moveDirection.y = moveTouch.mainButton.rectTransform.position.y - moveTouch.defaultArea.y;

            if (Mathf.Abs(moveDirection.x) < 19)
            {
                moveDirection.x = 0;
            }
            else
            {
                moveDirection.x = Mathf.Clamp(moveDirection.x / 75.000f, -1.000f, 1.000f);
            }

            if (Mathf.Abs(moveDirection.y) < 19)
            {
                moveDirection.y = 0;
            }
            else
            {
                moveDirection.y = Mathf.Clamp(moveDirection.y / 75.000f, -1.000f, 1.000f);
            }
        }
        else
        {
            moveTouch.mainButton.rectTransform.position = new Vector3(moveTouch.defaultArea.x, moveTouch.defaultArea.y);
            moveDirection = Vector2.zero;
        }
    }

    //Here we check if the clicked/tapped position is inside the joystick button
    void MobileButtonsCheck(Vector2 touchPos, int touchID)
    {
        //Move controller
        if (moveTouch.defaultArea.Contains(new Vector2(touchPos.x, Screen.height - touchPos.y)) && !moveTouch.isActive)
        {
            moveTouch.isActive = true;
            moveTouch.touchOffset = new Vector2(touchPos.x - moveTouch.defaultArea.x, Screen.height - touchPos.y - moveTouch.defaultArea.y);
            moveTouch.currentTouchPos = new Vector2(touchPos.x, Screen.height - touchPos.y);
            moveTouch.touchID = touchID;
        }
    }

    //Here we release the previously active joystick if we release the mouse button/finger from the screen
    void MobileButtonStop(int touchID)
    {
        if (moveTouch.isActive && moveTouch.touchID == touchID)
        {
            moveTouch.isActive = false;
            moveTouch.touchOffset = Vector2.zero;
            moveTouch.touchID = -1;
        }
    }
}
TouchPlayerController.cs
using UnityEngine;

public class TouchPlayerController : MonoBehaviour
{

    // Update is called once per frame
    void Update()
    {
        //Move Front/Back
        if (MobileJoystick_UI.instance.moveDirection.y != 0)
        {
            transform.Translate(transform.forward * Time.deltaTime * 2.45f * MobileJoystick_UI.instance.moveDirection.y, Space.World);
        }

        //Rotate Left/Right
        if (MobileJoystick_UI.instance.moveDirection.x != 0)
        {
            transform.Rotate(new Vector3(0, 14, 0) * Time.deltaTime * 4.5f * MobileJoystick_UI.instance.moveDirection.x, Space.Self);
        }
    }
}
Langkah 2: Siapkan Adegan Sederhana Menggunakan Script di Atas
- Buat Adegan baru
- Buat GameObject baru dan beri nama '_TouchInput'
- Lampirkan skrip MobileJoystick_UI ke dalamnya
- Tetapkan variabel 'Navigation Circle' dan 'Navigation button'.
Anda dapat menggunakan sprite di bawah ini atau klik di sini:


- Setelah mengimpornya ke Unity, pastikan untuk mengubah jenis Tekstur menjadi 'Sprite (2D and UI)'

Langkah 3: Siapkan Mesin Virtual Pemain
Terakhir, kita siapkan instance player (Dalam kasus saya ini adalah GameObject sederhana dengan Silinder di dalamnya):
- Buat GameObject baru dan beri nama 'MobilePlayer'
- Lampirkan skrip TouchPlayerController ke dalamnya
- Buat Silinder baru dan turunkan tingginya hingga terlihat hampir rata (Dalam kasus saya skalanya adalah (x: 1 y: 0.0142 z: 1) )
- Pindahkan Silinder ke dalam GameObject 'MobilePlayer'
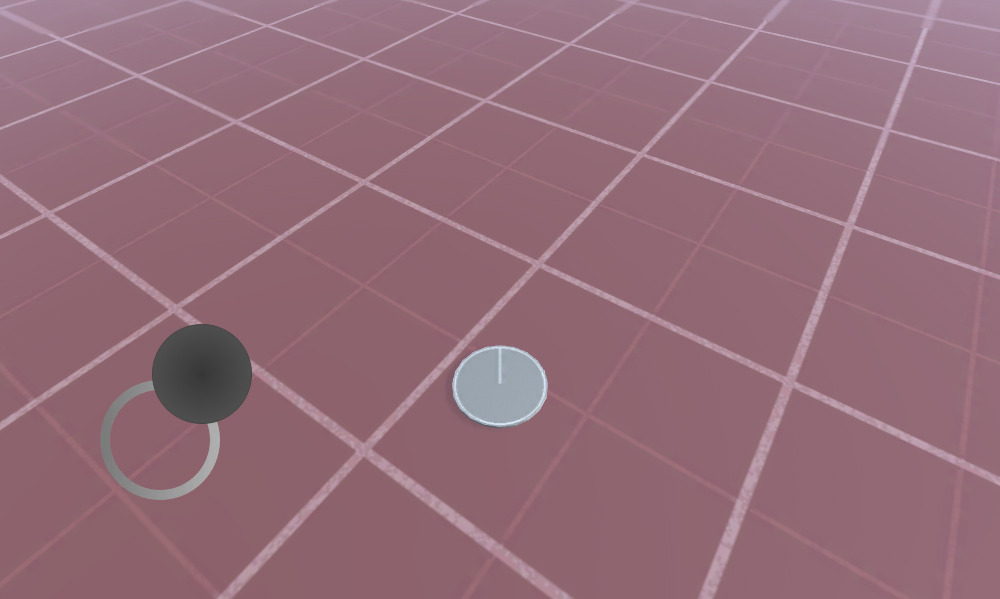
- Untuk tujuan pengujian, Anda juga dapat menggerakkan Kamera Utama di dalam 'MobilePlayer' dan memutarnya sehingga mengarah ke pemutar seperti ini:

Sekarang saatnya menekan Play dan lihat apakah semuanya berfungsi dengan baik.

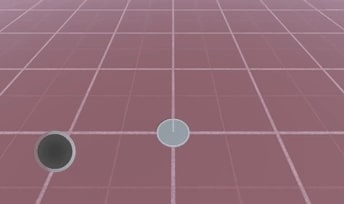
Semuanya berfungsi seperti yang diharapkan! Pemain dikendalikan dengan menggerakkan tombol joystick.
Skrip MobileJoystick_UI mendukung input sentuhan seluler dan klik mouse (jika Anda bermain di editor).