Tutorial Pengontrol Worm 3D untuk Unity
Dalam tutorial ini, saya akan menunjukkan cara membuat pengontrol cacing sederhana di Unity, terinspirasi oleh seri tutorial pengembangan game pemula TornadoTwins.
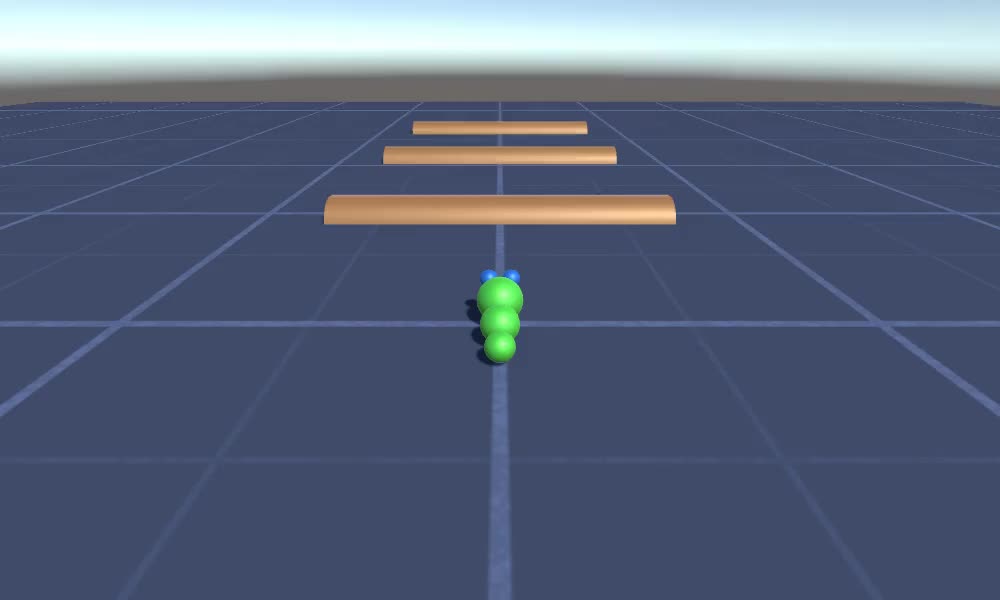
Pengontrol cacing akan meluncur dengan efek mengikuti ekor yang mulus dan memiliki kemampuan untuk melompat.
Skrip dalam tutorial ini awalnya ditulis dalam JavaScript (alias UnityScript) yang tidak lagi didukung, jadi saya akan memberikan alternatif C#.
Untuk membuat pengontrol worm di Unity kita memerlukan:
- Buat skrip yang diperlukan
- Buat karakter cacing
- Tetapkan skrip ke karakter
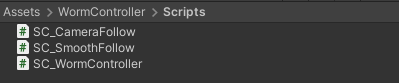
Langkah 1: Buat semua skrip yang diperlukan
Mari kita mulai dengan membuat semua skrip yang diperlukan untuk menyiapkan pengontrol worm:
- Buat skrip baru, beri nama "SC_WormController" dan tempel kode di bawah ini di dalamnya:
SC_WormController.cs
using System.Collections;
using System.Collections.Generic;
using UnityEngine;

[RequireComponent(typeof(CharacterController))]
public class SC_WormController : MonoBehaviour
{
    public float speed = 3.0f;
    public float rotateSpeed = 1.0f;
    public float jumpSpeed = 5.0f;
    public float gravity = 9.8f;

    CharacterController controller;
    Vector3 moveDirection;

    // Start is called before the first frame update
    void Start()
    {
        controller = GetComponent<CharacterController>();
    }

    // Update is called once per frame
    void Update()
    {
        // Rotate around y - axis
        transform.Rotate(0, Input.GetAxis("Horizontal") * rotateSpeed, 0);

        // Move forward / backward
        Vector3 forward = transform.TransformDirection(Vector3.forward);
        float curSpeed = speed * Input.GetAxis("Vertical");
        float movementDirectionY = moveDirection.y;
        moveDirection = forward * curSpeed;

        // Jumping
        if (Input.GetButtonDown("Jump") && controller.isGrounded)
        {
            moveDirection.y = jumpSpeed;
        }
        else
        {
            moveDirection.y = movementDirectionY;
        }

        // Apply gravity. Gravity is multiplied by deltaTime twice (once here, and once below
        // when the moveDirection is multiplied by deltaTime). This is because gravity should be applied
        // as an acceleration (ms^-2)
        if (!controller.isGrounded)
        {
            moveDirection.y -= gravity * Time.deltaTime;
        }

        // Move the controller
        controller.Move(moveDirection * Time.deltaTime);
    }
}- Buat skrip baru, beri nama "SC_CameraFollow" dan tempelkan kode di bawah ini ke dalamnya:
SC_CameraFollow.cs
using System.Collections;
using System.Collections.Generic;
using UnityEngine;

public class SC_CameraFollow : MonoBehaviour
{
    /*
    This camera smoothers out rotation around the y-axis and height.
    Horizontal Distance to the target is always fixed.

    There are many different ways to smooth the rotation but doing it this way gives you a lot of control over how the camera behaves.

    For every of those smoothed values we calculate the wanted value and the current value.
    Then we smooth it using the Lerp function.
    Then we apply the smoothed values to the transform's position.
    */

    // The target we are following
    public Transform target;
    // The distance in the x-z plane to the target
    public float distance = 10.0f;
    // the height we want the camera to be above the target
    public float height = 5.0f;
    // How much we
    public float heightDamping = 2.0f;
    public float rotationDamping = 3.0f;

    void LateUpdate()
    {
        // Early out if we don't have a target
        if (!target)
            return;

        // Calculate the current rotation angles
        float wantedRotationAngle = target.eulerAngles.y;
        float wantedHeight = target.position.y + height;
        float currentRotationAngle = transform.eulerAngles.y;
        float currentHeight = transform.position.y;

        // Damp the rotation around the y-axis
        currentRotationAngle = Mathf.LerpAngle(currentRotationAngle, wantedRotationAngle, rotationDamping * Time.deltaTime);

        // Damp the height
        currentHeight = Mathf.Lerp(currentHeight, wantedHeight, heightDamping * Time.deltaTime);

        // Convert the angle into a rotation
        Quaternion currentRotation = Quaternion.Euler(0, currentRotationAngle, 0);

        // Set the position of the camera on the x-z plane to:
        // distance meters behind the target
        transform.position = target.position;
        transform.position -= currentRotation * Vector3.forward * distance;

        // Set the height of the camera
        transform.position = new Vector3(transform.position.x, currentHeight, transform.position.z);

        // Always look at the target
        transform.LookAt(target);
    }
}- Buat skrip baru, beri nama "SC_SmoothFollow" dan tempel kode di bawah ini di dalamnya:
SC_SmoothFollow.cs
using System.Collections;
using System.Collections.Generic;
using UnityEngine;

public class SC_SmoothFollow : MonoBehaviour
{
    // The target we are following
    public Transform target;
    // The distance in the x-z plane to the target
    public float distance = 10.0f;
    // the height we want the camera to be above the target
    public float height = 5.0f;
    // How much we
    public float heightDamping = 2.0f;
    public float rotationDamping = 3.0f;

    // Start is called before the first frame update
    void Start()
    {
        if (!target) return;

        transform.LookAt(target);
    }

    void LateUpdate()
    {
        // Early out if we don't have a target
        if (!target) return;

        // Calculate the current rotation angles
        float wantedRotationAngle = target.eulerAngles.y;
        float wantedHeight = target.position.y + height;

        float currentRotationAngle = transform.eulerAngles.y;
        float currentHeight = transform.position.y;

        // Damp the rotation around the y-axis
        currentRotationAngle = Mathf.LerpAngle(currentRotationAngle, wantedRotationAngle, rotationDamping * Time.deltaTime);

        // Damp the height
        currentHeight = Mathf.Lerp(currentHeight, wantedHeight, heightDamping * Time.deltaTime);

        // Convert the angle into a rotation
        var currentRotation = Quaternion.Euler(0, currentRotationAngle, 0);

        // Set the position of the camera on the x-z plane to:
        // distance meters behind the target
        transform.position = target.position;
        transform.position -= currentRotation * Vector3.forward * distance;

        // Set the height of the camera
        transform.position = new Vector3(transform.position.x, currentHeight, transform.position.z);

        // Always look at the target
        transform.LookAt(target);
    }
}
Langkah 2: Buat Karakter Cacing
Langkah selanjutnya adalah membuat karakter worm:
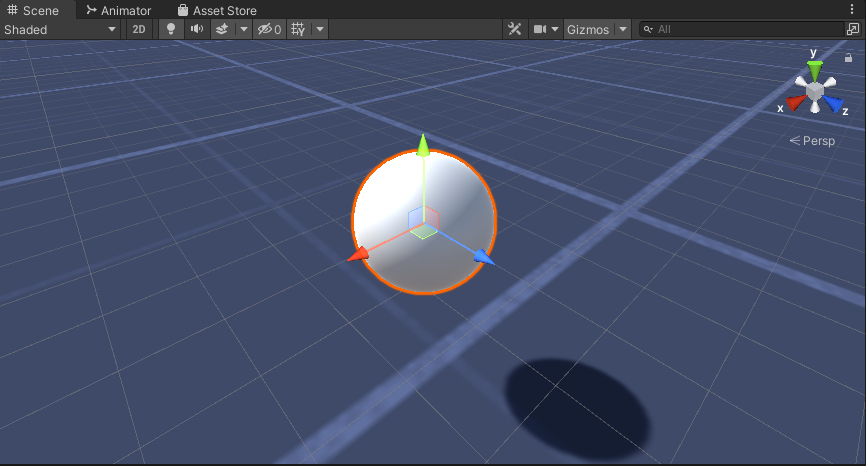
- Buat Sphere baru (GameObject -> 3D Object -> Sphere) ubah posisinya menjadi (0, 0, 0), hapus komponen SphereCollidernya, dan ganti namanya menjadi "Worm"
- Gandakan bola "Worm", ubah namanya menjadi "BodyPart1", ubah posisinya menjadi (0, -0.1, -0.9), dan ubah skalanya menjadi (0.8, 0.8, 0.8)
- Gandakan lagi bola "Worm", ubah namanya menjadi "BodyPart2", ubah posisinya menjadi (0, -0.2, -1.6), dan ubah skalanya menjadi (0.6, 0.6, 0.6)

- Klik kanan pada objek "Worm" -> Buat Kosong dan ganti nama objek yang baru dibuat menjadi "Eyes"
- Gandakan bola "BodyPart2", ubah namanya menjadi "Eye" dan pindahkan ke dalam objek "Eyes", ubah posisinya menjadi (-0.24, 0.353, 0.324) dan ubah skalanya menjadi (0.4, 0.4, 0.4)
- Gandakan bola "Eye" dan ubah posisi X-nya menjadi 0,24
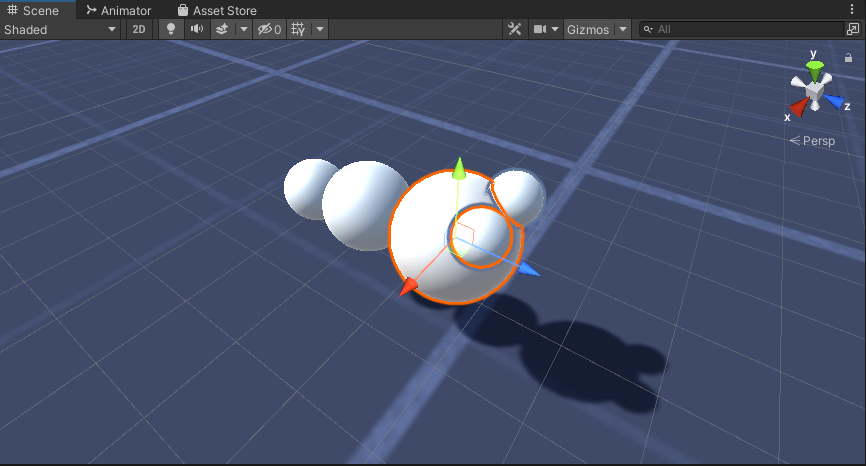
- Untuk visualisasinya, Anda bisa membuat beberapa material, misalnya hijau untuk badan dan biru untuk mata.
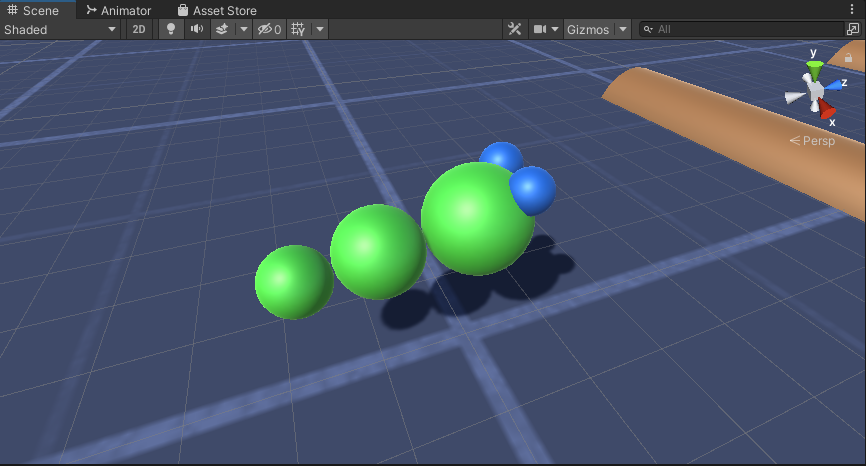
Karakter Cacing sudah siap.
Langkah 3: Siapkan Pengontrol Worm
Langkah terakhir adalah menetapkan skrip:
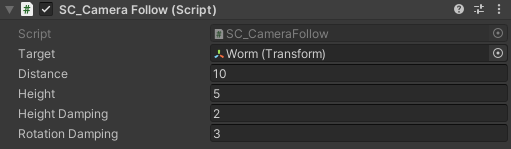
- Lampirkan skrip SC_CameraFollow ke objek Kamera Utama dan tetapkan "Worm" Sphere ke variabel target:
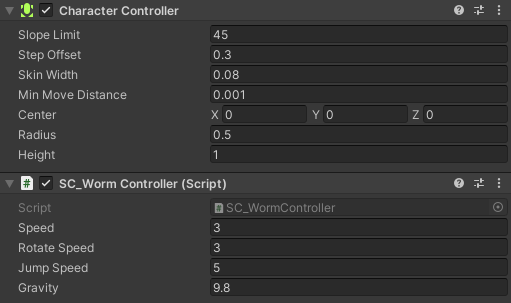
- Lampirkan skrip SC_WormController ke lingkup "Worm" (Secara otomatis akan menambahkan komponen lain yang disebut CharacterController):
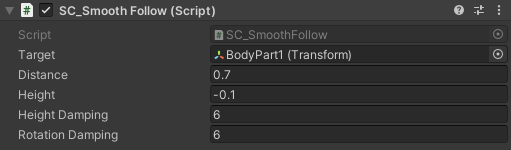
- Lampirkan skrip SC_SmoothFollow ke lingkup "BodyPart1" dan tetapkan nilainya sama seperti pada screenshot di bawah:
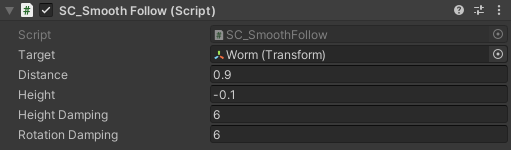
- Lampirkan skrip SC_SmoothFollow ke lingkup "BodyPart2" dan tetapkan nilainya sama seperti pada screenshot di bawah:
Pengontrol sekarang siap, gunakan W, A, S, dan D untuk bergerak dan Spasi untuk melompat.
Paket sumber Unity tersedia di bawah.